
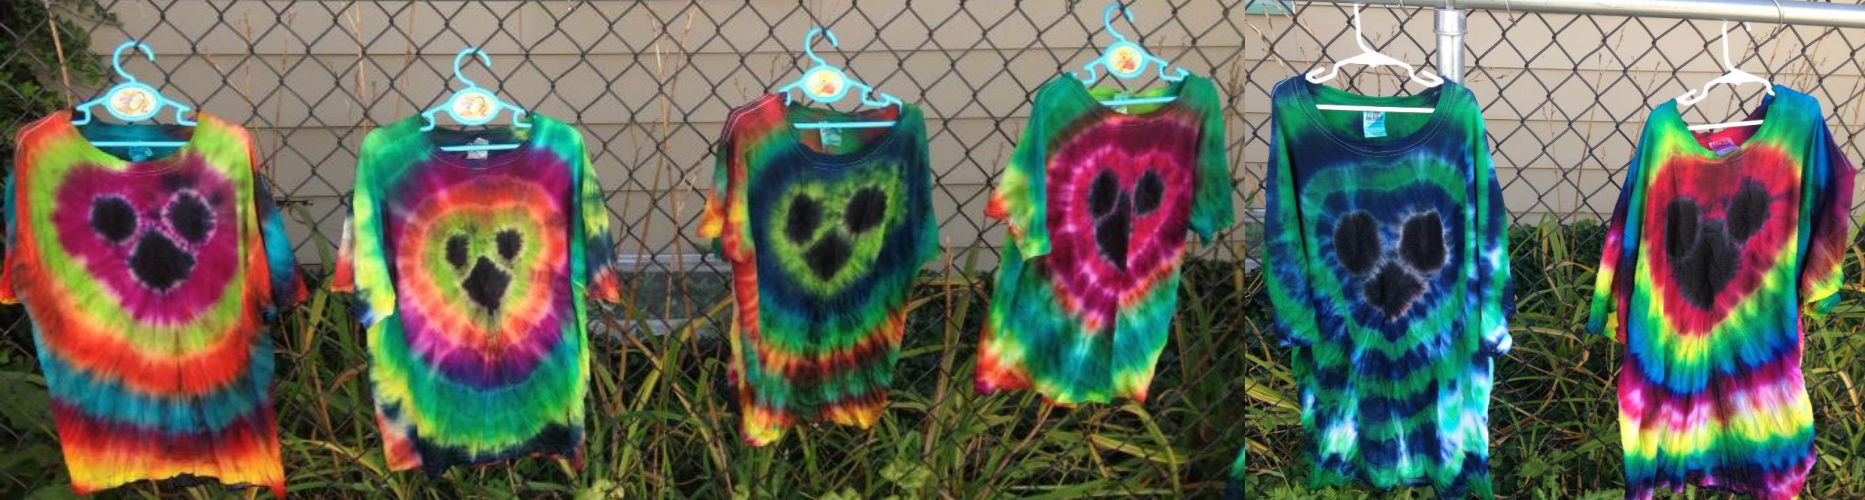
How to make a tie dye Mickey shirt
Are you planning a Disney trip?
Do you want to stand out from the others?
Why don’t you make a Mickey head tie dye shirt!
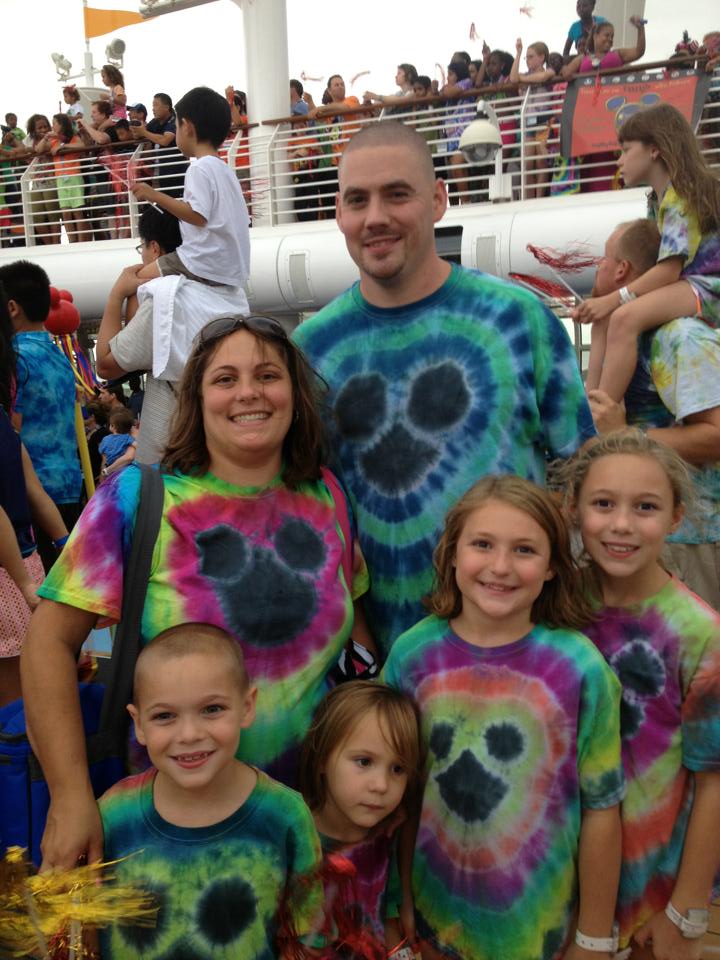
No matter if you are going to Walt Disney World, Disneyland, Aulani, setting sail on a Disney cruise, or taking an adventure with Adventures by Disney these would be good to wear and stand out. My family went on a Disney Cruise where we wore these shirts. We were all so excited to set sail on the Disney Fantasy and while we were preparing for our vacation we met up with friends who were sailing as well and made these shirts. They were super easy and fun to make. We were able to pick the colors that we liked and it was awesome how they all turned out totally different and no two could or would ever be the same.
Supplies you will need:
- 100% cotton t-shirt (others do not hold the color well)
- Colored chalk
- Mickey head stencil
- A bag of thick rubber bands
- Bucket of ice
- Tie dye mix (best if made with ice cold water)
- Squirt or squeeze bottles (found with the dye supplies or even sold in a kit)
- Plastic wrap
- Ziploc bag
Directions:
- Lay the shirt out flat
- Place a printout of a Mickey head on the shirt
- Use a piece of colored chalk to trace the outline of the Mickey head and remove the paper
- You will only be doing the front of the shirt, lift layer of the shirt, place a rubber band around one of the ears, and then repeat for the other ear as well as the head. Place the rubber bands as tightly and as closely as you can around each of the parts of the Mickey outline
- Pick up the shirt by the rubber banded Mickey head and let the shirt including the sleeves and let it hang into a long snake
- Place rubber bands tightly at about 2.5 inch intervals down the entire shirt. You will now have a long snake with rubber bands around every 2.5 inches
- Soak the shirt in a bucket of ice water
- Put on rubber gloves
- Choose 1 color (a darker color works best and one you wont be using again) dye the 3 Mickey pieces the color of your choice
- Wrap the dyed Mickey head tightly in plastic wrap
- Dye each section of the shirt between rubber bands a different color. Try to make the colors different to make each part stand out. Make sure you put enough dye for it to soak into the shirt completely so you will have a bright and vibrant shirt with little to no white
- Once the shirt is fully dyed, wrap it up tightly in plastic wrap (keeping the snake form)
- Once it is wrapped in the plastic wrap coil the snake up and wrap again in plastic wrap then place into a ziploc bag.
- Let the shirt sit in ziplock bag for 24-48 hours (for brighter colors leave it for 48 hours)
- Put on rubber gloves
- After letting the colors sit unwrap the shirt, and carefully snip the rubber bands with a scissor.
- Wash the Mickey shirt alone or with other Mickey shirts in the hottest water available with no laundry detergent
- You can hang shirt to dry or tumble dry
Now your shirt is a fun piece of art that is ready to be worn and enjoy!

Written by 9 year old guest writer Victoria. Victoria is the daughter of AnnMarie Bariexca, an owner at 101 Dream Vacations. If you are looking for a magical vacation be sure to contact 101 Dream Vacations. 101 Dream Vacations will work with you to plan the most magical and memorable cruise ever!